Note
Access to this page requires authorization. You can try signing in or changing directories.
Access to this page requires authorization. You can try changing directories.
You can use Solution Explorer to manage the projects and files within a solution. This article describes the Solution Explorer user interface (UI) in detail, and how to open Solution Explorer if you inadvertently close it. The article also describes how you can use right-click context menu in Solution Explorer to quickly add new files, folders, and code elements to a project.
Open Solution Explorer
By default, the Solution Explorer tool window appears as a pane in the upper-right side of the Visual Studio integrated development environment (IDE). If you don't see the Solution Explorer tool window, you can open it from the Visual Studio menu bar by using View > Solution Explorer, or by selecting Ctrl+Alt+L.

Solution Explorer UI
Let's take a look at the Solution Explorer tool window and its UI (user interface). We'll start with an annotated screenshot of an open C# console solution that has two projects.

The following table is a text-equivalent of the annotated screenshot, but with a few handy links you can use to learn more.
| UI element | Action |
|---|---|
| Toolbar | Control how your files appear |
| Search bar | Search for specific files and file types |
| Main window | View and manage your files, projects, & solutions |
| Solution node | Manage your solution(s) |
| Project node | Manage your project(s) |
| Dependencies node | Manage your solution & project dependencies |
| Program node | View, edit, and manage your program or application (app) |
| Git Changes tab | Use Git & GitHub within Visual Studio to collaborate on projects with your team |
To view more of the application images and icons that appear in Visual Studio, download the Visual Studio Image Library.
Solution Explorer toolbar
To continue, let's take a closer look at the toolbar in Solution Explorer.

The toolbar contains the following UI elements, from left to right:
| UI element | Action |
|---|---|
| Back button | Toggle between search results |
| Forward button | Toggle between search results |
| Home button | Return to the default view |
| Switch Views button | Switch between the default Solution view and the optional Folder view |
| Pending Changes Filter button & drop-down menu | View open files or files with pending changes |
| Sync with Active Document button | Locate a file from the code editor |
| Refresh button (conditional) | Appears only when you select a dependency, such as a function or a package |
| Collapse All button | Collapse the file view in the main window |
| Show All Files button | View all files, including unloaded projects |
| Properties button | View and change settings for specific files and components |
| Preview Selected Items button | View a selected file or component in the code editor |
Solution Explorer search bar
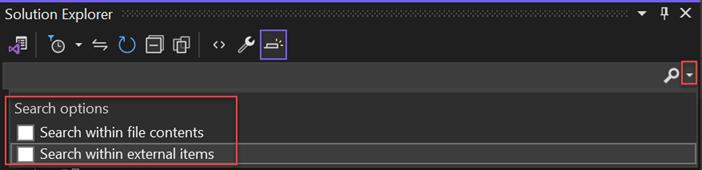
Let's take a closer look at the search bar in Solution Explorer.
You can use the dropdown in the search bar and select from the Search options: Search within file contents and Search within external items, to scope your search.
Solution Explorer context menu
In Solution Explorer, there are several options that you can interact with by using the right-click context menu. The context-specific options that appear depend on whether you select a Solution node or a Project node.
Solution node menu options
The following screenshot for a C# console app shows the context menu options that appear when you right-click the Solution node.

What you see in the context menu from the Solution node also depends on your project type, programming language, or platform. The following screenshot highlights the following extra options for a C# app: Project Dependencies, Project Build Order, Set Startup Projects, and a Git fly-out menu. These extra options typically appear when you add another project to a solution and then add it to a repo.

Project node menu options
The following screenshot for a C# console app shows the context menu options that appear when you right-click the Project node.

What you see in the context menu from the Project node also depends on your project type, programming language, or platform. The following screenshot highlights the following extra option for a C# app: a Build Dependencies fly-out menu. Extra options typically appear when you add another project to a solution and then add it to a repo.

The Add menu
In the Solution Explorer context menu, one of the most useful options is the Add fly-out menu. From it, you can add another project to a solution. You can also add an item to a project, and more.

You can view the Add fly-out menu from either the Solution node, the Project node, or the Dependencies node. The options vary, depending on which node you use.
For a tutorial that walks you through how to add items and projects by using the context menu in Solution Explorer, see the Introduction to projects and solutions page.
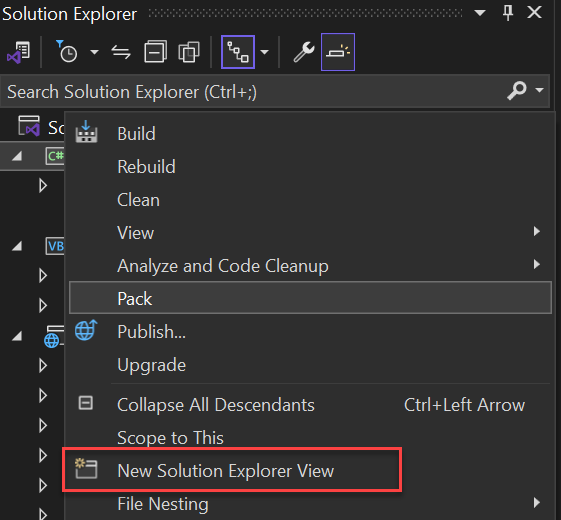
New Solution Explorer View
You can use the New Solution Explorer View to add a new scoped Solution Explorer view. In the Solution Explorer, right-click on the folder you want to set as the root folder of the new view and then select New Solution Explore View from the context menu. A new Solution Explorer window appears that you can dock or float as needed.