Bemærk
Adgang til denne side kræver godkendelse. Du kan prøve at logge på eller ændre mapper.
Adgang til denne side kræver godkendelse. Du kan prøve at ændre mapper.
Gælder for:✅ Fabric Data Engineering og Data Science
Lær, hvordan du indsender Spark batchjobs ved hjælp af Livy API for Fabric Data Engineering. Livy API'en understøtter i øjeblikket ikke Azure Service Principal (SPN).
Forudsætninger
Fabric Premium eller Prøvekapacitet med et Lakehouse.
En fjernklient som Visual Studio Code med Jupyter Notebooks, PySpark og Microsoft Authentication Library (MSAL) til Python.
En Microsoft Entra app-token er nødvendig for at få adgang til Fabric Rest API'en. Registrer en ansøgning hos Microsoft-identitetsplatform.
Nogle data i dit lakehouse bruger i dette eksempel NYC Taxi & Limousine Commission green_tripdata_2022_08 en parketfil, der er indlæst i lakehouse.
Livy-API'en definerer et samlet slutpunkt for handlinger. Erstat pladsholderne {Entra_TenantID}, {Entra_ClientID}, {Fabric_WorkspaceID} og {Fabric_LakehouseID} med de relevante værdier, når du følger eksemplerne i denne artikel.
Konfigurér Visual Studio Code til din Livy API Batch
Vælg Lakehouse Settings i din Fabric Lakehouse.

Gå til sektionen Livy-slutpunkt .

Kopier batchjob-forbindelsesstreng (anden røde boks i billedet) til din kode.
Navigér til Microsoft Entra-administrationscenter og kopier både applikations-(klient-)ID og Directory (tenant) ID til din kode.


Opret en Spark Batch-kode, og upload den til dit Lakehouse
Opret en notesbog
.ipynbi Visual Studio Code og indsæt følgende kodeimport sys import os from pyspark.sql import SparkSession from pyspark.conf import SparkConf from pyspark.sql.functions import col if __name__ == "__main__": #Spark session builder spark_session = (SparkSession .builder .appName("batch_demo") .getOrCreate()) spark_context = spark_session.sparkContext spark_context.setLogLevel("DEBUG") tableName = spark_context.getConf().get("spark.targetTable") if tableName is not None: print("tableName: " + str(tableName)) else: print("tableName is None") df_valid_totalPrice = spark_session.sql("SELECT * FROM green_tripdata_2022 where total_amount > 0") df_valid_totalPrice_plus_year = df_valid_totalPrice.withColumn("transaction_year", col("lpep_pickup_datetime").substr(1, 4)) deltaTablePath = f"Tables/{tableName}CleanedTransactions" df_valid_totalPrice_plus_year.write.mode('overwrite').format('delta').save(deltaTablePath)Gem Python-filen lokalt. Denne Python-kode-payload indeholder to Spark-sætninger, der arbejder på data i et Lakehouse og skal uploades til din Lakehouse. Du skal bruge ABFS (Azure Blob File System)-stien for payloaden til reference i dit Livy API batchjob i Visual Studio Code og dit Lakehouse-tabelnavn i SQL-sætningen
SELECT.
Upload Python-payloaden til filsektionen i dit Lakehouse. I Lakehouse-stifinderen skal du vælge Filer. Vælg derefter >Hent data>Upload filer. Vælg filer via filvælgeren.

Når filen er i Filer-sektionen i dit Lakehouse, skal du vælge de tre prikker (ellipser) til højre for dit payload-filnavn og vælge Egenskaber.
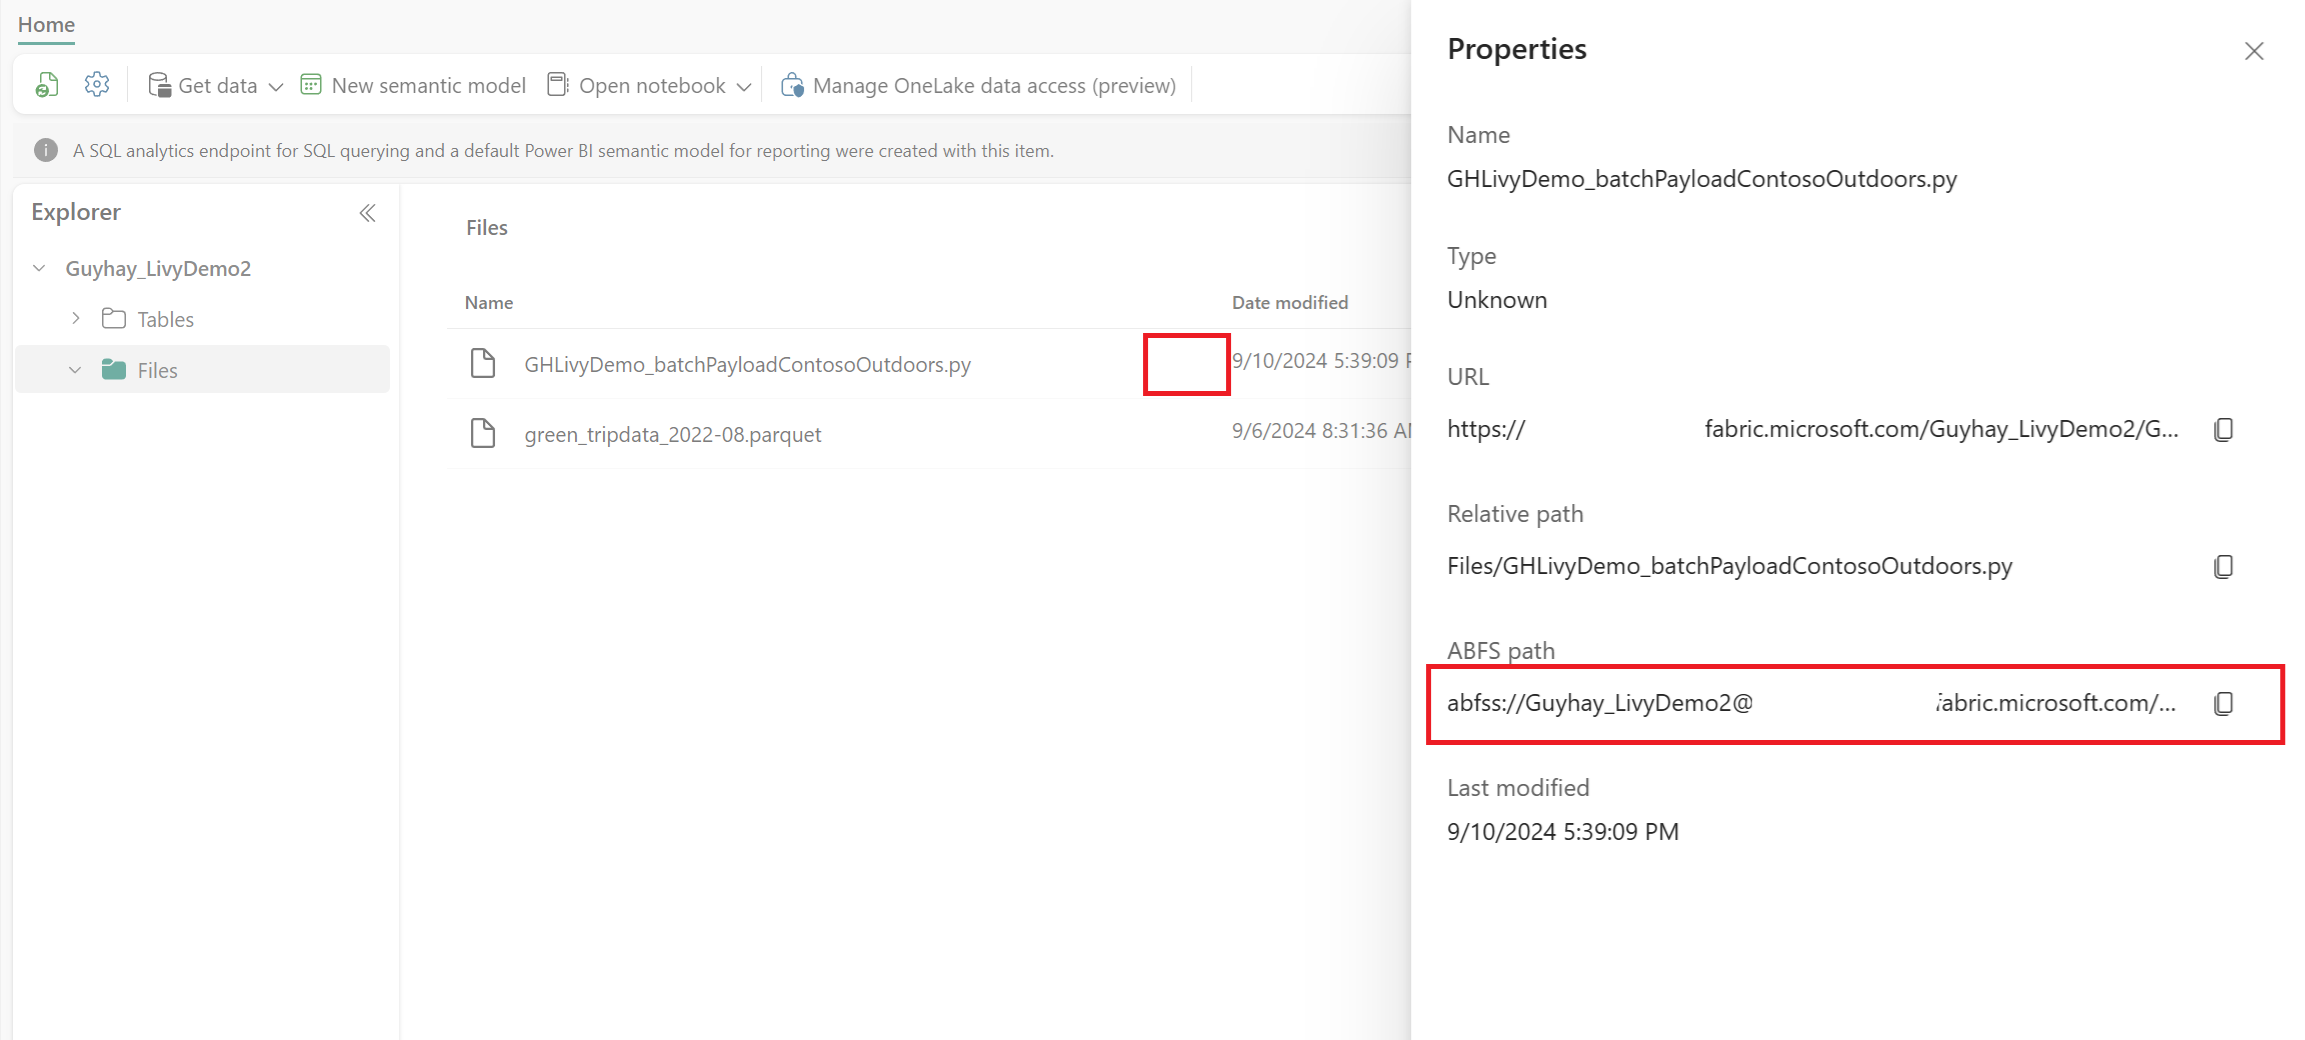
Kopiér denne ABFS-sti til din notesbogcelle i trin 1.


Autentificér en Livy API Spark batch-session ved enten at bruge et Microsoft Entra brugertoken eller et Microsoft Entra SPN-token
Autentificér en Livy API Spark batch-session ved hjælp af et Microsoft Entra SPN-token
Opret en notesbog
.ipynbi Visual Studio Code og indsæt følgende kode.import sys from msal import ConfidentialClientApplication # Configuration - Replace with your actual values tenant_id = "Entra_TenantID" # Microsoft Entra tenant ID client_id = "Entra_ClientID" # Service Principal Application ID # Certificate paths - Update these paths to your certificate files certificate_path = "PATH_TO_YOUR_CERTIFICATE.pem" # Public certificate file private_key_path = "PATH_TO_YOUR_PRIVATE_KEY.pem" # Private key file certificate_thumbprint = "YOUR_CERTIFICATE_THUMBPRINT" # Certificate thumbprint # OAuth settings audience = "https://analysis.windows.net/powerbi/api/.default" authority = f"https://login.windows.net/{tenant_id}" def get_access_token(client_id, audience, authority, certificate_path, private_key_path, certificate_thumbprint=None): """ Get an app-only access token for a Service Principal using OAuth 2.0 client credentials flow. This function uses certificate-based authentication which is more secure than client secrets. Args: client_id (str): The Service Principal's client ID audience (str): The audience for the token (resource scope) authority (str): The OAuth authority URL certificate_path (str): Path to the certificate file (.pem format) private_key_path (str): Path to the private key file (.pem format) certificate_thumbprint (str): Certificate thumbprint (optional but recommended) Returns: str: The access token for API authentication Raises: Exception: If token acquisition fails """ try: # Read the certificate from PEM file with open(certificate_path, "r", encoding="utf-8") as f: certificate_pem = f.read() # Read the private key from PEM file with open(private_key_path, "r", encoding="utf-8") as f: private_key_pem = f.read() # Create the confidential client application app = ConfidentialClientApplication( client_id=client_id, authority=authority, client_credential={ "private_key": private_key_pem, "thumbprint": certificate_thumbprint, "certificate": certificate_pem } ) # Acquire token using client credentials flow token_response = app.acquire_token_for_client(scopes=[audience]) if "access_token" in token_response: print("Successfully acquired access token") return token_response["access_token"] else: raise Exception(f"Failed to retrieve token: {token_response.get('error_description', 'Unknown error')}") except FileNotFoundError as e: print(f"Certificate file not found: {e}") sys.exit(1) except Exception as e: print(f"Error retrieving token: {e}", file=sys.stderr) sys.exit(1) # Get the access token token = get_access_token(client_id, audience, authority, certificate_path, private_key_path, certificate_thumbprint)Kør notebook-cellen, du burde se Microsoft Entra-tokenet returneret.


Autentificér en Livy API Spark-session ved hjælp af et Microsoft Entra-brugertoken
Opret en notesbog
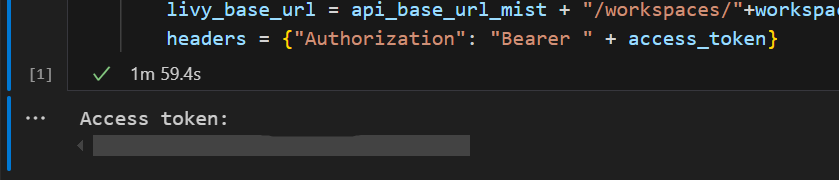
.ipynbi Visual Studio Code og indsæt følgende kode.from msal import PublicClientApplication import requests import time # Configuration - Replace with your actual values tenant_id = "Entra_TenantID" # Microsoft Entra tenant ID client_id = "Entra_ClientID" # Application ID (can be the same as above or different) # Required scopes for Livy API access scopes = [ "https://api.fabric.microsoft.com/Lakehouse.Execute.All", # Required — execute operations in lakehouses "https://api.fabric.microsoft.com/Lakehouse.Read.All", # Required — read lakehouse metadata "https://api.fabric.microsoft.com/Code.AccessFabric.All", # Required — general Fabric API access from Spark Runtime "https://api.fabric.microsoft.com/Code.AccessStorage.All", # Required — access OneLake and Azure storage from Spark Runtime ] # Optional scopes — add these only if your Spark jobs need access to the corresponding services: # "https://api.fabric.microsoft.com/Code.AccessAzureKeyvault.All" # Optional — access Azure Key Vault from Spark Runtime # "https://api.fabric.microsoft.com/Code.AccessAzureDataLake.All" # Optional — access Azure Data Lake Storage Gen1 from Spark Runtime # "https://api.fabric.microsoft.com/Code.AccessAzureDataExplorer.All" # Optional — access Azure Data Explorer from Spark Runtime # "https://api.fabric.microsoft.com/Code.AccessSQL.All" # Optional — access Azure SQL audience tokens from Spark Runtime def get_access_token(tenant_id, client_id, scopes): """ Get an access token using interactive authentication. This method will open a browser window for user authentication. Args: tenant_id (str): The Azure Active Directory tenant ID client_id (str): The application client ID scopes (list): List of required permission scopes Returns: str: The access token, or None if authentication fails """ app = PublicClientApplication( client_id, authority=f"https://login.microsoftonline.com/{tenant_id}" ) print("Opening browser for interactive authentication...") token_response = app.acquire_token_interactive(scopes=scopes) if "access_token" in token_response: print("Successfully authenticated") return token_response["access_token"] else: print(f"Authentication failed: {token_response.get('error_description', 'Unknown error')}") return None # Uncomment the lines below to use interactive authentication token = get_access_token(tenant_id, client_id, scopes) print("Access token acquired via interactive login")Kør notesbogcellen. Der vises et pop op-vindue i browseren, så du kan vælge den identitet, du vil logge på med.

Når du har valgt den identitet, du vil logge ind med, skal du godkende Microsoft Entra app-registrerings-API-tilladelserne.

Luk browservinduet, når godkendelsen er fuldført.

I Visual Studio Code burde du kunne se Microsoft Entra-tokenet returneret.


Forståelse af Code.* omfang for Livy API'en
Når dine Spark-jobs kører via Livy API'en, styrer scopes, Code.* hvilke eksterne tjenester Spark Runtime kan få adgang til på vegne af den autentificerede bruger. To er påkrævet; Resten er valgfrie afhængigt af din arbejdsbyrde.
Påkrævede Code.* scopes
| Omfanget | Beskrivelse |
|---|---|
Code.AccessFabric.All |
Gør det muligt at få adgangstokens til Microsoft Fabric. Påkrævet for alle Livy API-operationer. |
Code.AccessStorage.All |
Gør det muligt at få adgangstokene til OneLake og Azure-lagring. Påkrævet for at læse og skrive data i søhuse. |
Valgfrie Code.* scopes
Tilføj kun disse scopes, hvis dine Spark-jobs har brug for adgang til de tilsvarende Azure-tjenester under runtime.
| Omfanget | Beskrivelse | Hvornår skal du bruge? |
|---|---|---|
Code.AccessAzureKeyvault.All |
Gør det muligt at få adgangstokene til Azure Key Vault. | Din Spark-kode henter hemmeligheder, nøgler eller certifikater fra Azure Key Vault. |
Code.AccessAzureDataLake.All |
Gør det muligt at få adgangstoks til Azure Data Lake Storage Gen1. | Din Spark-kode læser fra eller skriver til Azure Data Lake Storage Gen1-konti. |
Code.AccessAzureDataExplorer.All |
Gør det muligt at få adgangstokene til Azure Data Explorer (Kusto). | Din Spark-kode forespørger eller indlæser data til/fra Azure Data Explorer-klynger. |
Code.AccessSQL.All |
Gør det muligt at få adgangstokene til Azure SQL. | Din Spark-kode skal kunne forbindes til Azure SQL-databaser. |
Bemærkning
Og Lakehouse.Execute.AllLakehouse.Read.All skoperne er også påkrævet, men er ikke en del af Code.* familien. De giver tilladelse til at udføre operationer i og læse metadata fra Fabric søhuse.
Send en Livy Batch, og overvåg batchjob.
Tilføj en anden notesbogcelle, og indsæt denne kode.
# submit payload to existing batch session

import requests
import time
import json

api_base_url = "https://api.fabric.microsoft.com/v1"  # Base URL for Fabric APIs

# Fabric Resource IDs - Replace with your workspace and lakehouse IDs
workspace_id = "Fabric_WorkspaceID"
lakehouse_id = "Fabric_LakehouseID"

# Construct the Livy Batch API URL
# URL pattern: {base_url}/workspaces/{workspace_id}/lakehouses/{lakehouse_id}/livyApi/versions/{api_version}/batches
livy_base_url = f"{api_base_url}/workspaces/{workspace_id}/lakehouses/{lakehouse_id}/livyApi/versions/2023-12-01/batches"

# Set up authentication headers
headers = {"Authorization": f"Bearer {token}"}

print(f"Livy Batch API URL: {livy_base_url}")

new_table_name = "TABLE_NAME"  # Name for the new table

# Configure the batch job
print("Configuring batch job parameters...")

# Batch job configuration - Modify these values for your use case
payload_data = {
    # Job name - will appear in the Fabric UI
    "name": f"livy_batch_demo_{new_table_name}",

    # Path to your Python file in the lakehouse
    "file": "<ABFSS_PATH_TO_YOUR_PYTHON_FILE>",  # Replace with your Python file path

    # Optional: Spark configuration parameters
    "conf": {
        "spark.targetTable": new_table_name,  # Custom configuration for your application
    },
}

print("Batch Job Configuration:")
print(json.dumps(payload_data, indent=2))

try:
    # Submit the batch job
    print("\nSubmitting batch job...")
    post_batch = requests.post(livy_base_url, headers=headers, json=payload_data)

    if post_batch.status_code == 202:
        batch_info = post_batch.json()
        print("Livy batch job submitted successfully!")
        print(f"Batch Job Info: {json.dumps(batch_info, indent=2)}")

        # Extract batch ID for monitoring
        batch_id = batch_info['id']
        livy_batch_get_url = f"{livy_base_url}/{batch_id}"

        print(f"\nBatch Job ID: {batch_id}")
        print(f"Monitoring URL: {livy_batch_get_url}")

    else:
        print(f"Failed to submit batch job. Status code: {post_batch.status_code}")
        print(f"Response: {post_batch.text}")

except requests.exceptions.RequestException as e:
    print(f"Network error occurred: {e}")
except json.JSONDecodeError as e:
    print(f"JSON decode error: {e}")
    print(f"Response text: {post_batch.text}")
except Exception as e:
    print(f"Unexpected error: {e}")
Kør notesbogcellen. Du kan se flere linjer udskrevet, når Livy-batchjobbet oprettes og køres.

Hvis du vil se ændringerne, skal du gå tilbage til dit søhus.

Integration med Fabric-miljøer
Denne Livy API-session kører som standard i forhold til standardstartgruppen for arbejdsområdet. Alternativt kan du bruge Fabric Environments Create, configur og bruge et miljø i Microsoft Fabric til at tilpasse Spark-poolen, som Livy API-sessionen bruger til disse Spark-jobs. For at bruge dit Fabric Environment, opdater den tidligere notesbogscelle med denne ene linjeændring.
payload_data = {
    "name":"livybatchdemo_with"+ newlakehouseName,
    "file":"abfss://YourABFSPathToYourPayload.py",
    "conf": {
        "spark.targetLakehouse": "Fabric_LakehouseID",
        "spark.fabric.environmentDetails" : "{\"id\" : \""EnvironmentID"\"}"  # remove this line to use starter pools instead of an environment, replace "EnvironmentID" with your environment ID
        }
    }
Få vist dine job i overvågningshubben
Du kan få adgang til overvågningshubben for at få vist forskellige Apache Spark-aktiviteter ved at vælge Overvåg i navigationslinkene til venstre.
Når batchjobbet er fuldført, kan du få vist sessionsstatussen ved at gå til Overvågning.

Vælg og åbn det seneste aktivitetsnavn.

I denne Livy API-session kan du se din tidligere batchafsendelse, køre detaljer, Spark-versioner og konfiguration. Læg mærke til den stoppet status øverst til højre.


For at opsummere hele processen har du brug for en fjernklient som Visual Studio Code, et Microsoft Entra app-token, Livy API endpoint URL, autentificering mod dit Lakehouse, en Spark-payload i din Lakehouse og til sidst en batch Livy API-session.